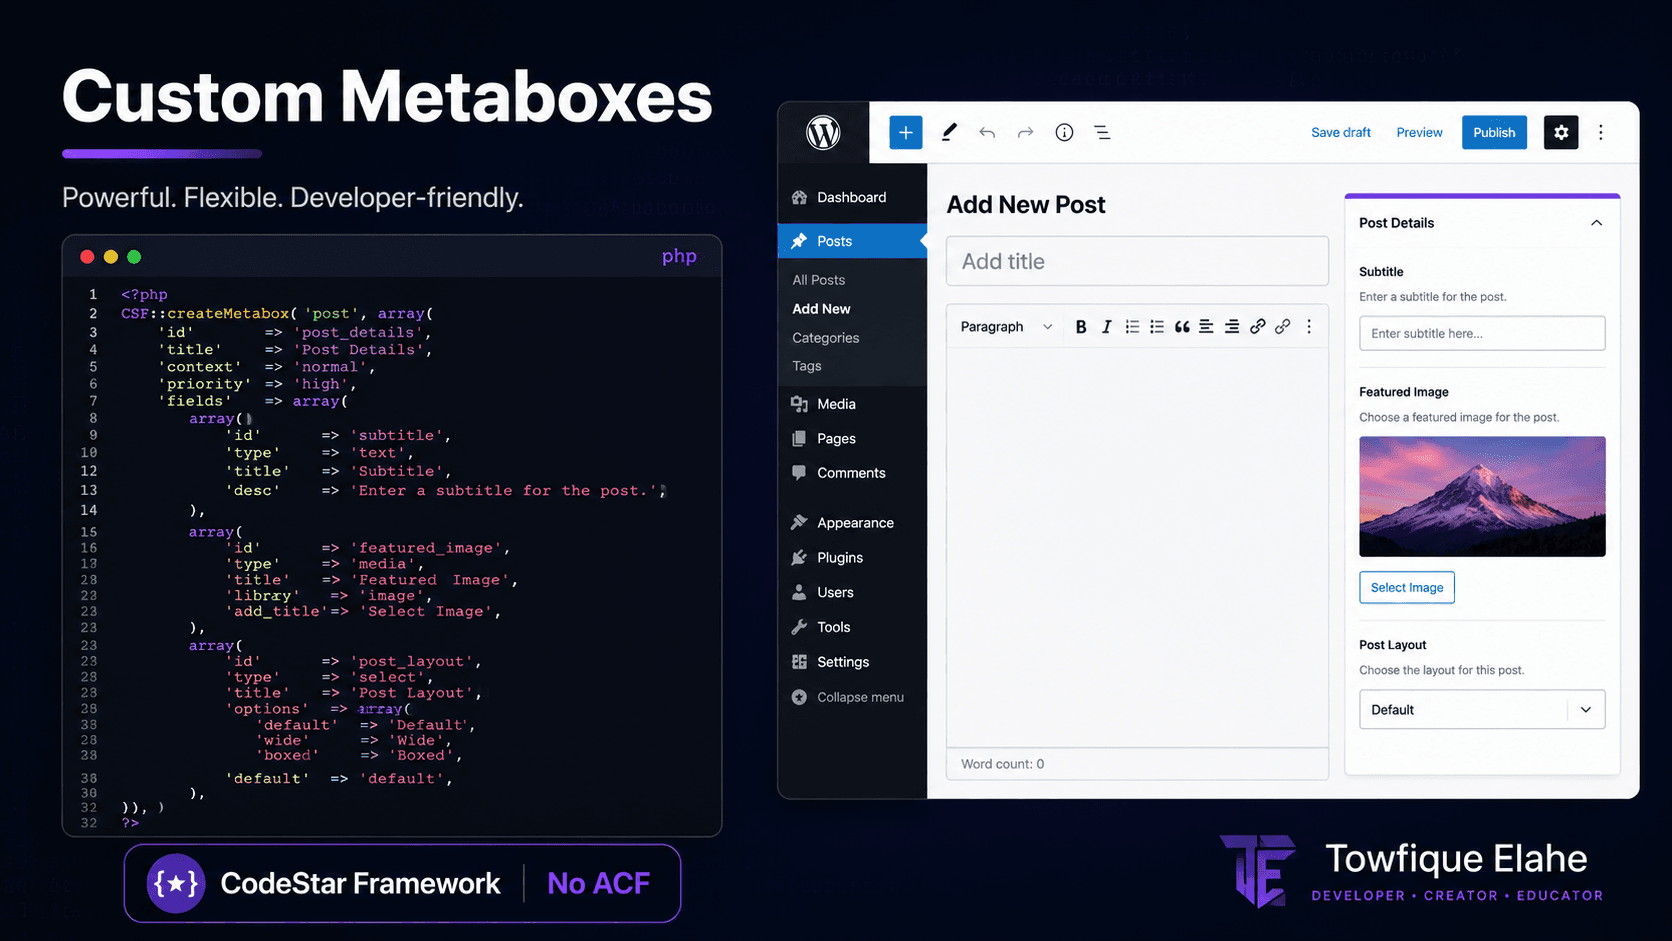
How to Build Custom Metaboxes in WordPress Using CodeStar Framework
ACF is popular — but it's not your only option. CodeStar Framework lets you build fully custom metaboxes with rich field types directly in PHP, with zero database bloat and complete control over your data structure. Here's how to use it properly on any WordPress project.
Why Use CodeStar Framework Instead of ACF?
Advanced Custom Fields (ACF) is the go-to for many WordPress developers — but it comes with a cost. The free version is limited, the Pro version adds a recurring expense to every client project, and the field data is stored in a way that can create significant database overhead on content-heavy sites.
CodeStar Framework (CSF) is a free, open-source options and metabox framework for WordPress themes and plugins. It gives you the same rich field types — text, textarea, image, gallery, repeater, color picker, select, date, and more — entirely through PHP configuration arrays. No GUI dependency, no license fees, no database bloat beyond standard post meta.
If you're building themes or plugins for clients and want full control over your field structure in code, CSF is one of the cleanest solutions available.
Installing CodeStar Framework
CSF is designed to be bundled directly inside your theme or plugin — not installed as a standalone plugin. This is intentional: it keeps your project self-contained and removes any dependency on the client maintaining a separate plugin.
Download or clone the framework from its GitHub repository and place it inside your theme:
your-theme/
├── inc/
│   └── csf/          ← CSF framework files go here
├── functions.php
Then load it from functions.php:
// Load CodeStar Framework
if ( file_exists( get_template_directory() . '/inc/csf/csf.php' ) ) {
    require_once get_template_directory() . '/inc/csf/csf.php';
}
CSF will initialize automatically once included. No activation step required.
Registering Your First Metabox
All CSF metaboxes are registered using CSF::createMetabox(). The first argument is a unique ID, the second is a configuration array. Everything — the title, post types it appears on, fields inside — is defined in that array.
if ( class_exists( 'CSF' ) ) {

    CSF::createMetabox( 'project_details', array(
        'title'     => 'Project Details',
        'post_type' => 'project',
    ) );

    CSF::createSection( 'project_details', array(
        'fields' => array(

            array(
                'id'    => 'project_client',
                'type'  => 'text',
                'title' => 'Client Name',
            ),

            array(
                'id'    => 'project_url',
                'type'  => 'text',
                'title' => 'Live URL',
                'desc'  => 'Enter the full URL including https://',
            ),

            array(
                'id'      => 'project_status',
                'type'    => 'select',
                'title'   => 'Project Status',
                'options' => array(
                    'live'        => 'Live',
                    'in_progress' => 'In Progress',
                    'maintenance' => 'Maintenance',
                ),
            ),

            array(
                'id'    => 'project_thumbnail',
                'type'  => 'image',
                'title' => 'Project Cover Image',
            ),

        ),
    ) );

}
This registers a metabox titled Project Details that appears on the project CPT editor, containing four fields: client name, URL, status dropdown, and a cover image uploader.
Retrieving Metabox Values in Templates
CSF stores all metabox values as a serialized array under a single post meta key — the metabox ID. Retrieve the entire set with one call:
$meta = get_post_meta( get_the_ID(), 'project_details', true );
Then access individual fields by their id:
$client    = isset( $meta['project_client'] ) ? $meta['project_client'] : '';
$url       = isset( $meta['project_url'] ) ? $meta['project_url'] : '';
$status    = isset( $meta['project_status'] ) ? $meta['project_status'] : '';
$thumbnail = isset( $meta['project_thumbnail'] ) ? $meta['project_thumbnail'] : '';
For image fields, CSF stores the image URL as a string by default. You can then use it directly in an <img> tag or pass it to wp_get_attachment_image() if you stored the attachment ID instead (use 'type' => 'image' with 'url' => false to get the ID).
Common Field Types and When to Use Them
Text & Textarea
array(
    'id'    => 'project_summary',
    'type'  => 'textarea',
    'title' => 'Project Summary',
    'rows'  => 4,
),
Use for short strings, URLs, labels, and longer plain-text descriptions. Always sanitize output with esc_html() or wp_kses_post() depending on whether HTML is expected.
Image & Gallery
array(
    'id'    => 'project_gallery',
    'type'  => 'gallery',
    'title' => 'Project Screenshots',
),
The gallery field stores a comma-separated list of attachment IDs. Loop through them with explode() and render each with wp_get_attachment_image() for proper srcset and lazy loading support.
Select & Multi-Select
array(
    'id'       => 'project_technologies',
    'type'     => 'select',
    'title'    => 'Technologies Used',
    'multiple' => true,
    'options'  => array(
        'wordpress'  => 'WordPress',
        'elementor'  => 'Elementor',
        'woocommerce'=> 'WooCommerce',
        'nextjs'     => 'Next.js',
        'supabase'   => 'Supabase',
    ),
),
Multi-select stores values as an array. Use implode() to display as a comma-separated string, or loop through for individual badges.
Color Picker
array(
    'id'      => 'project_accent_color',
    'type'    => 'color',
    'title'   => 'Accent Color',
    'default' => '#0066FF',
),
Outputs a hex string. Useful for per-post theming — inject it as a CSS custom property in the template for dynamic color accents per project or service.
Date
array(
    'id'    => 'project_launch_date',
    'type'  => 'date',
    'title' => 'Launch Date',
),
Stores the date as a string in Y-m-d format. Use date_i18n() to format it for display.
Using the Repeater Field
The repeater is one of CSF's most powerful fields — it lets you define a group of sub-fields that editors can add, remove, and reorder dynamically. Perfect for things like project milestones, team members, feature lists, or pricing tiers.
array(
    'id'     => 'project_milestones',
    'type'   => 'repeater',
    'title'  => 'Project Milestones',
    'fields' => array(

        array(
            'id'    => 'milestone_title',
            'type'  => 'text',
            'title' => 'Milestone',
        ),

        array(
            'id'    => 'milestone_date',
            'type'  => 'date',
            'title' => 'Date',
        ),

        array(
            'id'      => 'milestone_status',
            'type'    => 'select',
            'title'   => 'Status',
            'options' => array(
                'done'       => 'Completed',
                'in_progress'=> 'In Progress',
                'planned'    => 'Planned',
            ),
        ),

    ),
),
Repeater data is stored as a nested array. Loop through it in your template:
$milestones = isset( $meta['project_milestones'] ) ? $meta['project_milestones'] : array();

foreach ( $milestones as $milestone ) {
    $title  = esc_html( $milestone['milestone_title'] );
    $date   = esc_html( $milestone['milestone_date'] );
    $status = esc_html( $milestone['milestone_status'] );
    // render each row
}
Attaching a Metabox to Multiple Post Types
Pass an array to post_type to display the same metabox on multiple CPTs:
CSF::createMetabox( 'shared_details', array(
    'title'     => 'Shared Details',
    'post_type' => array( 'project', 'case_study', 'service' ),
) );
This is useful for fields shared across content types — like a client name, location, or featured flag — that you don't want to register separately on each CPT.
Organising Fields with Sections and Tabs
For metaboxes with many fields, use multiple CSF::createSection() calls with a title to create tabbed sections inside the same metabox:
CSF::createSection( 'project_details', array(
    'title'  => 'General',
    'fields' => array(
        // general fields
    ),
) );

CSF::createSection( 'project_details', array(
    'title'  => 'Media',
    'fields' => array(
        // image/gallery fields
    ),
) );

CSF::createSection( 'project_details', array(
    'title'  => 'SEO',
    'fields' => array(
        // meta title, description fields
    ),
) );
CSF renders these as a tabbed interface inside the metabox panel, keeping the editor clean even when a post type has 20+ custom fields.
Conditional Logic on Fields
CSF supports showing or hiding fields based on the value of another field using the dependency argument:
array(
    'id'      => 'project_status',
    'type'    => 'select',
    'title'   => 'Project Status',
    'options' => array(
        'live'       => 'Live',
        'coming_soon'=> 'Coming Soon',
    ),
),

array(
    'id'         => 'project_launch_date',
    'type'       => 'date',
    'title'      => 'Expected Launch Date',
    'dependency' => array( 'project_status', '==', 'coming_soon' ),
),
The launch date field only appears when the status is set to "Coming Soon". This keeps the editor interface clean and context-relevant for whoever is managing the content.
Best Practices for Client Projects
- Always wrap CSF calls in
class_exists( 'CSF' )— prevents fatal errors if the framework file is missing or not yet loaded. - Keep all metabox registrations in a dedicated file —
inc/metaboxes.php— and require it fromfunctions.phpfor clean separation. - Use descriptive field IDs — prefix with the post type slug (e.g.,
project_client) to avoid collisions when multiple metaboxes share a post type. - Sanitize all output — CSF stores raw input. Always escape with
esc_html(),esc_url(), orwp_kses_post()when rendering in templates. - Use default values — set sensible defaults in each field definition so templates don't break when a field is left empty by the editor.
Final Thoughts
CodeStar Framework gives you everything ACF Pro offers for custom metaboxes — repeaters, conditional logic, rich field types, tabbed sections — without the licensing cost or plugin dependency. Since it bundles directly into your theme or plugin, the configuration travels with the codebase, stays in version control, and works out of the box on every environment from local to production.
For agency projects and client builds where maintainability and cost matter, CSF is a practical, professional alternative worth having in your toolkit.
In the next post, we'll look at building a WordPress Theme Options panel using the same CodeStar Framework — global site settings managed through a clean admin UI, all in PHP.