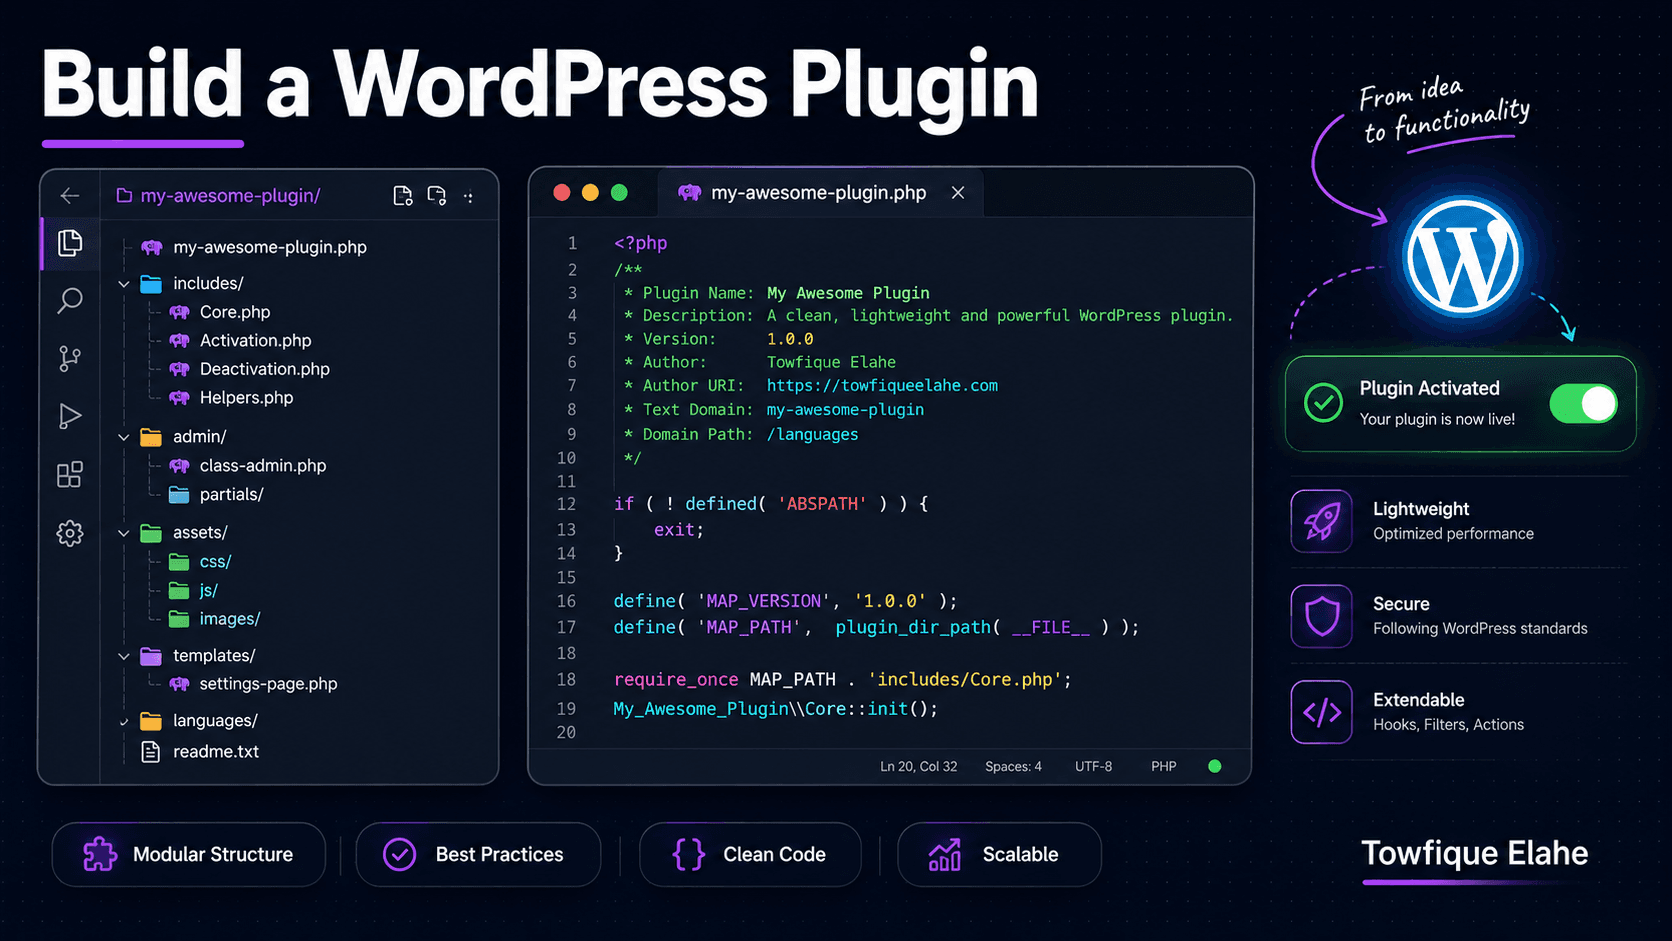
How to Build a Custom WordPress Plugin from Scratch (The Right Way)
Building a WordPress plugin isn't hard — building one that's clean, secure, and maintainable takes structure. This is a complete walkthrough of creating a custom plugin from scratch the right way: proper file organization, an OOP architecture, activation hooks, and safe uninstall handling.
Why Build a Custom Plugin?
Sooner or later, dropping code into a theme's functions.php stops making sense. Functionality that should persist across theme changes — custom post types, integrations, business logic — belongs in a plugin, not a theme. Themes control how a site looks; plugins control what it does.
The problem is that most plugin tutorials teach you to write everything in one long procedural file. That works for a five-line snippet but collapses under any real complexity. This guide builds a proper plugin from scratch — with clean structure, an object-oriented architecture, and the activation, security, and uninstall handling that separates a professional plugin from a hacky one.
We'll build a simple but realistic example: a plugin that registers a "Testimonials" custom post type and displays testimonials via a shortcode.
Step 1: The Plugin Folder and Main File
Every plugin lives in its own folder inside wp-content/plugins/. Start with a clear structure rather than a single file:
orbit-testimonials/
├── orbit-testimonials.php     (main plugin file — bootstrap only)
├── includes/
│   ├── class-orbit-testimonials.php   (main plugin class)
│   ├── class-post-type.php            (CPT registration)
│   └── class-shortcode.php            (shortcode logic)
├── admin/
│   └── class-admin.php                (admin-side logic)
├── assets/
│   ├── css/
│   └── js/
└── uninstall.php              (cleanup on deletion)
The main file's job is only to declare the plugin and bootstrap it — not to hold logic. It starts with the required plugin header comment that WordPress reads to list it in the admin:
<?php
/**
 * Plugin Name:       Orbit Testimonials
 * Plugin URI:        https://towfiqueelahe.com
 * Description:       Registers a Testimonials post type and displays them via a shortcode.
 * Version:           1.0.0
 * Author:            Towfique Elahe
 * Author URI:        https://towfiqueelahe.com
 * License:           GPL-2.0+
 * Text Domain:       orbit-testimonials
 */

// Prevent direct access
if ( ! defined( 'ABSPATH' ) ) {
    exit;
}
That ABSPATH check is critical — it stops anyone from loading the file directly via URL, a basic but essential security measure that belongs at the top of every PHP file in the plugin.
Step 2: Define Constants
Define a few constants for paths and version so you never hardcode them throughout the plugin. This keeps things maintainable and makes cache-busting assets trivial:
define( 'ORBIT_TESTIMONIALS_VERSION', '1.0.0' );
define( 'ORBIT_TESTIMONIALS_PATH', plugin_dir_path( __FILE__ ) );
define( 'ORBIT_TESTIMONIALS_URL', plugin_dir_url( __FILE__ ) );
Now ORBIT_TESTIMONIALS_PATH gives you the server path for including files, and ORBIT_TESTIMONIALS_URL gives you the URL for enqueuing assets — everywhere, consistently.
Step 3: Build the Main Plugin Class
Rather than scattering functions, use a main class as the plugin's controller. It loads dependencies and initializes the components. This is the clean, object-oriented approach that scales as the plugin grows.
// includes/class-orbit-testimonials.php

if ( ! defined( 'ABSPATH' ) ) {
    exit;
}

class Orbit_Testimonials {

    /**
     * The single instance of the class.
     */
    private static $instance = null;

    /**
     * Get the singleton instance.
     */
    public static function get_instance() {
        if ( null === self::$instance ) {
            self::$instance = new self();
        }
        return self::$instance;
    }

    /**
     * Constructor — load dependencies and hook things in.
     */
    private function __construct() {
        $this->load_dependencies();
        $this->init_components();
    }

    /**
     * Include the class files this plugin needs.
     */
    private function load_dependencies() {
        require_once ORBIT_TESTIMONIALS_PATH . 'includes/class-post-type.php';
        require_once ORBIT_TESTIMONIALS_PATH . 'includes/class-shortcode.php';
    }

    /**
     * Instantiate the components.
     */
    private function init_components() {
        new Orbit_Testimonials_Post_Type();
        new Orbit_Testimonials_Shortcode();
    }
}
The singleton pattern (get_instance()) ensures the plugin is only ever initialized once, avoiding duplicate hooks. Each responsibility — the post type, the shortcode — lives in its own focused class, following the single-responsibility principle from the clean-code post.
Step 4: The Post Type Class
Each component class handles one job and hooks itself into WordPress in its own constructor. Here's the CPT registration, self-contained:
// includes/class-post-type.php

if ( ! defined( 'ABSPATH' ) ) {
    exit;
}

class Orbit_Testimonials_Post_Type {

    public function __construct() {
        add_action( 'init', array( $this, 'register' ) );
    }

    public function register() {

        $labels = array(
            'name'          => 'Testimonials',
            'singular_name' => 'Testimonial',
            'add_new_item'  => 'Add New Testimonial',
            'edit_item'     => 'Edit Testimonial',
            'menu_name'     => 'Testimonials',
        );

        $args = array(
            'labels'       => $labels,
            'public'       => true,
            'has_archive'  => false,
            'menu_icon'    => 'dashicons-format-quote',
            'supports'     => array( 'title', 'editor', 'thumbnail' ),
            'show_in_rest' => true,
        );

        register_post_type( 'testimonial', $args );
    }
}
Passing array( $this, 'register' ) as the callback is how you hook a class method into WordPress. The class registers its own hook in the constructor, keeping all of its behavior in one tidy place.
Step 5: The Shortcode Class
The shortcode class handles displaying testimonials on the front end. Notice how the query logic and the markup are kept clearly separated, and every output is escaped:
// includes/class-shortcode.php

if ( ! defined( 'ABSPATH' ) ) {
    exit;
}

class Orbit_Testimonials_Shortcode {

    public function __construct() {
        add_shortcode( 'testimonials', array( $this, 'render' ) );
    }

    /**
     * Render the [testimonials] shortcode.
     *
     * @param array $atts Shortcode attributes.
     * @return string HTML output.
     */
    public function render( $atts ) {

        $atts = shortcode_atts( array(
            'count' => 3,
        ), $atts, 'testimonials' );

        $testimonials = $this->get_testimonials( absint( $atts['count'] ) );

        if ( empty( $testimonials ) ) {
            return '';
        }

        return $this->build_html( $testimonials );
    }

    /**
     * Fetch testimonials data.
     */
    private function get_testimonials( $count ) {

        $query = new WP_Query( array(
            'post_type'      => 'testimonial',
            'posts_per_page' => $count,
        ) );

        $items = array();

        if ( $query->have_posts() ) {
            while ( $query->have_posts() ) {
                $query->the_post();
                $items[] = array(
                    'name'    => get_the_title(),
                    'content' => get_the_content(),
                    'image'   => get_the_post_thumbnail_url( get_the_ID(), 'thumbnail' ),
                );
            }
            wp_reset_postdata();
        }

        return $items;
    }

    /**
     * Build the HTML markup from testimonial data.
     */
    private function build_html( $testimonials ) {

        $output = '<div class="orbit-testimonials">';

        foreach ( $testimonials as $item ) {
            $output .= '<div class="testimonial-card">';

            if ( $item['image'] ) {
                $output .= '<img src="' . esc_url( $item['image'] ) . '" alt="' . esc_attr( $item['name'] ) . '" />';
            }

            $output .= '<p class="testimonial-text">' . esc_html( wp_strip_all_tags( $item['content'] ) ) . '</p>';
            $output .= '<h4 class="testimonial-name">' . esc_html( $item['name'] ) . '</h4>';
            $output .= '</div>';
        }

        $output .= '</div>';

        return $output;
    }
}
The single render() method stays readable because the actual work is split into two focused private methods — one fetches data, one builds markup. This is single-responsibility thinking applied within a class.
Step 6: Bootstrap the Plugin
Back in the main plugin file, load the main class and start it up — but only after all plugins are loaded, to avoid ordering issues:
// Load the main class
require_once ORBIT_TESTIMONIALS_PATH . 'includes/class-orbit-testimonials.php';

/**
 * Start the plugin.
 */
function orbit_testimonials_init() {
    return Orbit_Testimonials::get_instance();
}
add_action( 'plugins_loaded', 'orbit_testimonials_init' );
Step 7: Activation and Deactivation Hooks
When a plugin registers a custom post type, WordPress needs to flush its rewrite rules on activation so the CPT's URLs work immediately. Handle this properly with activation and deactivation hooks:
/**
 * Runs on plugin activation.
 */
function orbit_testimonials_activate() {
    // Ensure the CPT is registered before flushing
    require_once ORBIT_TESTIMONIALS_PATH . 'includes/class-post-type.php';
    $post_type = new Orbit_Testimonials_Post_Type();
    $post_type->register();

    flush_rewrite_rules();
}
register_activation_hook( __FILE__, 'orbit_testimonials_activate' );

/**
 * Runs on plugin deactivation.
 */
function orbit_testimonials_deactivate() {
    flush_rewrite_rules();
}
register_deactivation_hook( __FILE__, 'orbit_testimonials_deactivate' );
Flushing rewrite rules only on activation and deactivation — not on every page load — is the correct, performant approach. Doing it on init every request is a common mistake that slows every page.
Step 8: Enqueue Assets Properly
If your plugin has CSS or JavaScript, never hardcode tags — enqueue them the WordPress way, using your version constant for cache busting:
class Orbit_Testimonials_Assets {

    public function __construct() {
        add_action( 'wp_enqueue_scripts', array( $this, 'enqueue' ) );
    }

    public function enqueue() {
        wp_enqueue_style(
            'orbit-testimonials',
            ORBIT_TESTIMONIALS_URL . 'assets/css/testimonials.css',
            array(),
            ORBIT_TESTIMONIALS_VERSION
        );
    }
}
Using ORBIT_TESTIMONIALS_VERSION as the version parameter means that every time you bump the plugin version, browsers automatically fetch the fresh CSS instead of a cached copy.
Step 9: Clean Uninstall Handling
A professional plugin cleans up after itself when a user deletes it. The uninstall.php file runs automatically when the plugin is deleted through the admin — the right place to remove any options or data the plugin created:
// uninstall.php

// Exit if not called by WordPress during uninstall
if ( ! defined( 'WP_UNINSTALL_PLUGIN' ) ) {
    exit;
}

// Remove any options the plugin created
delete_option( 'orbit_testimonials_settings' );

// Note: whether to delete the testimonial posts themselves
// is a judgment call — many plugins intentionally leave user
// content in place to avoid accidental data loss.
The WP_UNINSTALL_PLUGIN check ensures this code only ever runs during a genuine uninstall. Deciding whether to delete user-created content is an important choice — erring toward preserving data is usually the safer, more user-respecting default.
Step 10: Internationalization
To make your plugin translatable, wrap user-facing strings in translation functions and load the text domain. Even if you never translate it yourself, this lets others do so and is expected of any distributed plugin:
// Wrap strings for translation
$labels = array(
    'name'          => __( 'Testimonials', 'orbit-testimonials' ),
    'singular_name' => __( 'Testimonial', 'orbit-testimonials' ),
);

// Load the text domain
function orbit_testimonials_load_textdomain() {
    load_plugin_textdomain(
        'orbit-testimonials',
        false,
        dirname( plugin_basename( __FILE__ ) ) . '/languages'
    );
}
add_action( 'init', 'orbit_testimonials_load_textdomain' );
The Architecture Principles at Work
Step back and notice what this structure achieves — the same clean-code principles from the last post, applied concretely:
- Separation of concerns — each class handles one responsibility (post type, shortcode, assets).
- A clear entry point — the main file only bootstraps; logic lives in organized includes.
- Security by default —
ABSPATHchecks, escaped output, sanitized input throughout. - Proper lifecycle handling — activation, deactivation, and uninstall are all managed correctly.
- Maintainability — adding a new feature means adding a new focused class, not bloating an existing file.
This is what makes the difference between a plugin that works and a plugin that's professional. The functionality might be simple, but the architecture scales cleanly to something far more complex.
Final Thoughts
Building a WordPress plugin the right way isn't about writing more code — it's about organizing it well. With a clear folder structure, an object-oriented architecture where each class has one job, proper activation and uninstall handling, and security baked in from the first line, you get a plugin that's a pleasure to maintain and extend.
Start every plugin with this skeleton, even small ones. The structure costs a few extra minutes up front and saves hours later when the plugin inevitably grows. A well-architected plugin is one you can hand off, ship to the plugin directory, or return to a year later and still understand instantly.
In the next post, we'll extend this plugin with a settings page using the WordPress Settings API — giving users a proper admin interface to configure how the plugin behaves, built with the same clean, structured approach.