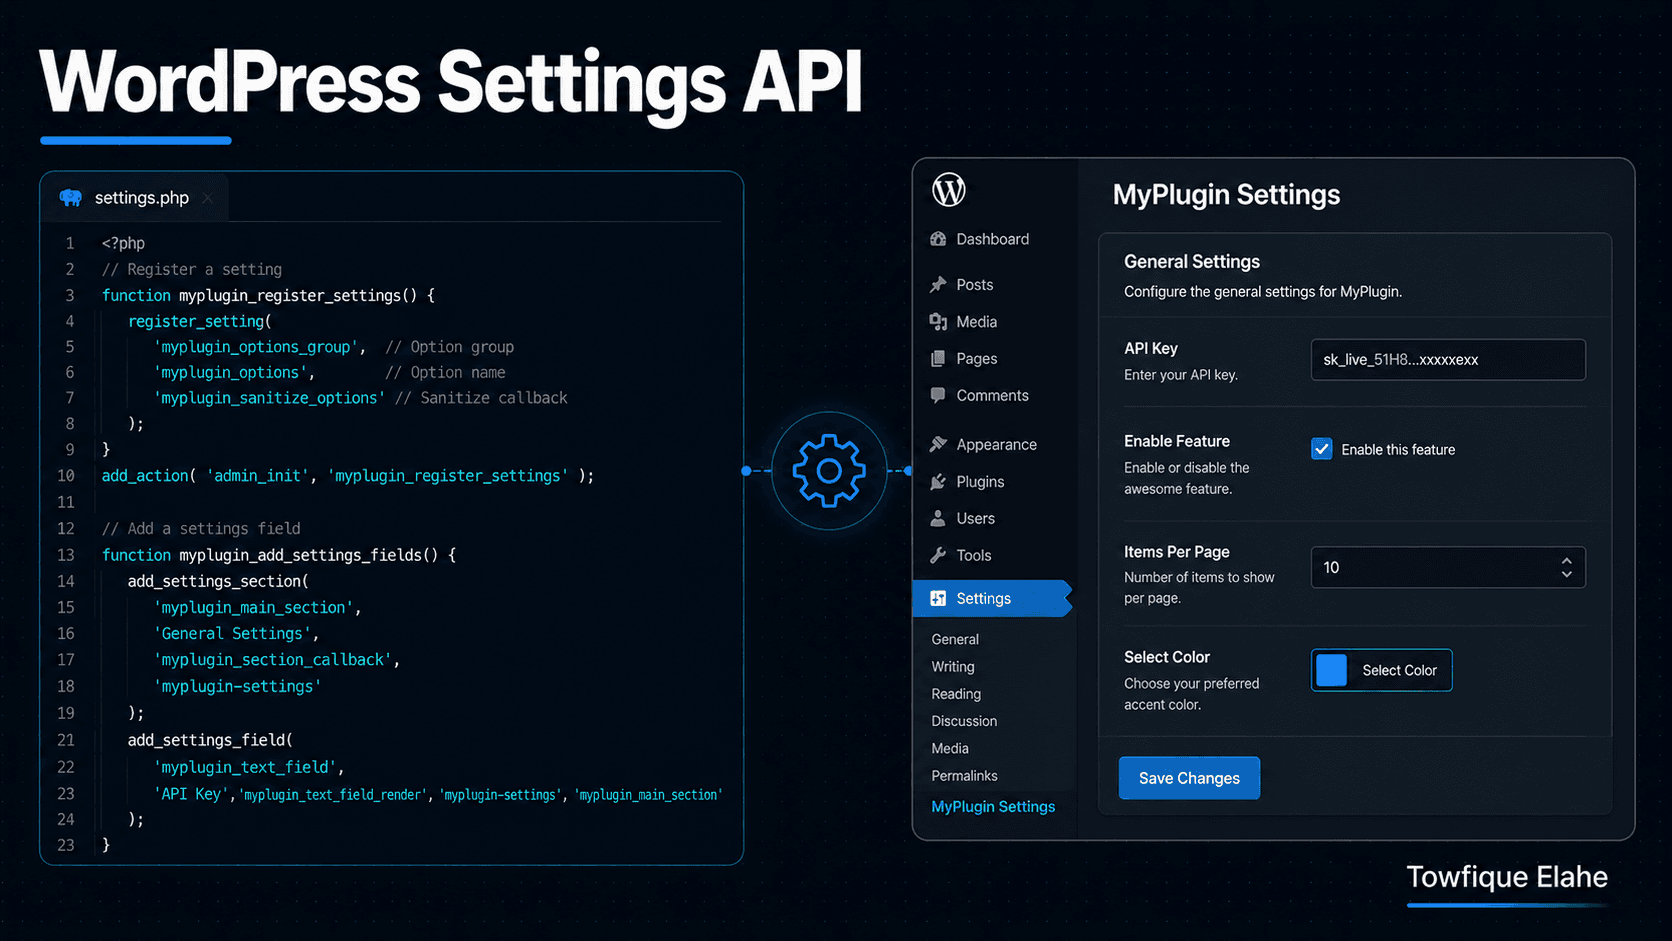
How to Add a Settings Page to a WordPress Plugin with the Settings API
The WordPress Settings API is powerful but notoriously confusing — which is why so many developers skip it and build insecure custom forms instead. This step-by-step tutorial demystifies it, adding a proper, secure settings page to a plugin with registered settings, sections, fields, and validation.
Why Use the Settings API?
When a plugin needs configuration options, many developers build a custom form, handle the $_POST submission themselves, and save to the database manually. It works — but it means writing your own nonce checks, sanitization, and saving logic, and it's easy to introduce security holes along the way.
The WordPress Settings API handles all of that for you. It manages form rendering, nonce verification, saving, and provides a structured way to organize settings into sections and fields. The trade-off is a learning curve — the API is famously confusing at first because of how its pieces connect. Once it clicks, though, it's the correct and secure way to build any options page.
This tutorial adds a settings page to the Testimonials plugin from the previous post, letting users configure how many testimonials show by default and toggle a few display options.
The Four Concepts You Need to Understand
The Settings API confuses people because four distinct pieces have to work together. Understanding what each does upfront makes everything else clear:
- Setting — the actual option stored in the database, registered with
register_setting(). This is where your data lives. - Section — a visual grouping of related fields on the page, added with
add_settings_section(). - Field — an individual input (text, checkbox, select), added with
add_settings_field()and rendered by a callback you write. - Page — the admin menu page where it all displays, created with
add_menu_page()oradd_submenu_page().
The flow: you register a setting to hold the data, create a page to show it, add sections to the page, and add fields to the sections. Keep that hierarchy in mind and the code stops feeling arbitrary.
Step 1: Create the Settings Class
Following the clean structure from the previous post, the settings page gets its own class. Create admin/class-settings.php:
// admin/class-settings.php

if ( ! defined( 'ABSPATH' ) ) {
    exit;
}

class Orbit_Testimonials_Settings {

    /**
     * The option name used to store all settings.
     */
    private $option_name = 'orbit_testimonials_settings';

    public function __construct() {
        add_action( 'admin_menu', array( $this, 'add_settings_page' ) );
        add_action( 'admin_init', array( $this, 'register_settings' ) );
    }
}
Two hooks drive everything: admin_menu adds the page to the admin sidebar, and admin_init registers the setting, sections, and fields. Storing everything under a single option name (an array) is cleaner than creating a separate database row for every field.
Step 2: Add the Admin Menu Page
Register the page under the Testimonials CPT menu as a submenu item:
public function add_settings_page() {

    add_submenu_page(
        'edit.php?post_type=testimonial',  // parent slug (under Testimonials)
        'Testimonials Settings',           // page title
        'Settings',                        // menu title
        'manage_options',                  // capability required
        'orbit-testimonials-settings',     // menu slug
        array( $this, 'render_page' )      // render callback
    );
}
The manage_options capability ensures only administrators can access the settings page. The render callback outputs the page's HTML — which we'll write next.
Step 3: Render the Page Wrapper
The page render method provides the form wrapper. The Settings API fills in the actual fields through special template functions:
public function render_page() {
    ?>
    <div class="wrap">
        <h1><?php echo esc_html( get_admin_page_title() ); ?></h1>

        <form action="options.php" method="post">
            <?php
            // Output nonce, action, and option_page fields
            settings_fields( 'orbit_testimonials_group' );

            // Output all sections and fields for this page
            do_settings_sections( 'orbit-testimonials-settings' );

            // The submit button
            submit_button( 'Save Settings' );
            ?>
        </form>
    </div>
    <?php
}
Three functions do the heavy lifting here. settings_fields() outputs the hidden security fields (including the nonce) automatically — this is where the API handles security for you. do_settings_sections() renders every section and field you registered. submit_button() outputs a properly styled save button. The form posts to options.php, WordPress's built-in settings handler — you never write the save logic yourself.
Step 4: Register the Setting
Now register the setting, section, and fields inside the register_settings() method. Start with the setting itself:
public function register_settings() {

    // 1. Register the setting (the database option)
    register_setting(
        'orbit_testimonials_group',       // option group (matches settings_fields)
        $this->option_name,               // option name in the database
        array(
            'sanitize_callback' => array( $this, 'sanitize' ),
            'default'           => array(
                'default_count'   => 3,
                'show_image'      => 1,
                'layout'          => 'grid',
            ),
        )
    );
The sanitize_callback is the crucial security piece — WordPress runs this method on the submitted data before saving, letting you validate and clean every field in one place. The option group name must match what you passed to settings_fields() in the form.
Step 5: Add a Section
Continue in the same method — add a section to group the fields:
    // 2. Add a settings section
    add_settings_section(
        'orbit_testimonials_display',           // section ID
        'Display Settings',                     // section title
        array( $this, 'section_description' ),  // description callback
        'orbit-testimonials-settings'           // page slug
    );
The description callback is optional but useful for explaining the section to users:
public function section_description() {
    echo '<p>Configure how testimonials are displayed by default.</p>';
}
Step 6: Add the Fields
Still inside register_settings(), add each field. Every field points to a callback that renders its input:
    // 3. Add fields to the section

    add_settings_field(
        'default_count',
        'Default Testimonial Count',
        array( $this, 'render_count_field' ),
        'orbit-testimonials-settings',
        'orbit_testimonials_display'
    );

    add_settings_field(
        'show_image',
        'Show Author Image',
        array( $this, 'render_image_field' ),
        'orbit-testimonials-settings',
        'orbit_testimonials_display'
    );

    add_settings_field(
        'layout',
        'Layout Style',
        array( $this, 'render_layout_field' ),
        'orbit-testimonials-settings',
        'orbit_testimonials_display'
    );
}
The last two arguments connect each field to its page and section. This is how the API knows where to render each input when do_settings_sections() runs.
Step 7: Write the Field Render Callbacks
Each field needs a method that outputs its input, pre-filled with the saved value. First, a helper to fetch current settings, then the individual renderers:
/**
 * Get a single setting value with fallback.
 */
private function get_value( $key, $default = '' ) {
    $options = get_option( $this->option_name, array() );
    return isset( $options[ $key ] ) ? $options[ $key ] : $default;
}

/**
 * Number input for default count.
 */
public function render_count_field() {
    $value = $this->get_value( 'default_count', 3 );
    ?>
    <input type="number" name="<?php echo esc_attr( $this->option_name ); ?>[default_count]"
           value="<?php echo esc_attr( $value ); ?>" min="1" max="20" />
    <?php
}

/**
 * Checkbox for showing the author image.
 */
public function render_image_field() {
    $value = $this->get_value( 'show_image', 1 );
    ?>
    <input type="checkbox" name="<?php echo esc_attr( $this->option_name ); ?>[show_image]"
           value="1" <?php checked( 1, $value ); ?> />
    <label>Display the author's photo with each testimonial</label>
    <?php
}

/**
 * Select dropdown for layout.
 */
public function render_layout_field() {
    $value = $this->get_value( 'layout', 'grid' );
    ?>
    <select name="<?php echo esc_attr( $this->option_name ); ?>[layout]">
        <option value="grid" <?php selected( 'grid', $value ); ?>>Grid</option>
        <option value="list" <?php selected( 'list', $value ); ?>>List</option>
        <option value="slider" <?php selected( 'slider', $value ); ?>>Slider</option>
    </select>
    <?php
}
Notice the field name attributes use array syntax — option_name[key]. This is what stores all fields together under the single option as an array. The checked() and selected() helper functions handle the tedious logic of marking the current value, keeping the markup clean.
Step 8: Sanitize the Input
This is the security-critical method referenced in register_setting(). It receives the raw submitted array and must return a cleaned version. Never trust input — validate and sanitize every field:
/**
 * Sanitize all settings before saving.
 *
 * @param array $input Raw submitted values.
 * @return array Cleaned values.
 */
public function sanitize( $input ) {

    $clean = array();

    // Count: force to integer, clamp to a sane range
    $count = isset( $input['default_count'] ) ? absint( $input['default_count'] ) : 3;
    $clean['default_count'] = min( max( $count, 1 ), 20 );

    // Checkbox: store 1 if checked, 0 if not
    $clean['show_image'] = isset( $input['show_image'] ) ? 1 : 0;

    // Select: only allow known values (whitelist)
    $allowed_layouts = array( 'grid', 'list', 'slider' );
    $layout = isset( $input['layout'] ) ? $input['layout'] : 'grid';
    $clean['layout'] = in_array( $layout, $allowed_layouts, true ) ? $layout : 'grid';

    return $clean;
}
Each field type gets appropriate treatment: the number is cast and clamped, the checkbox becomes a clean 1 or 0, and the select value is checked against a whitelist so no unexpected value can be saved. This whitelist approach — only allowing known-good values — is the safest way to handle select and radio inputs.
Step 9: Wire It Into the Plugin
Load and initialize the settings class from the main plugin class, as an admin-only component:
// In the main plugin class load_dependencies()
if ( is_admin() ) {
    require_once ORBIT_TESTIMONIALS_PATH . 'admin/class-settings.php';
}

// In init_components()
if ( is_admin() ) {
    new Orbit_Testimonials_Settings();
}
The is_admin() check ensures the settings code only loads in the admin area, not on every front-end page load — a small but worthwhile performance habit.
Step 10: Use the Settings in Your Plugin
With settings saved, put them to work. Update the shortcode from the previous post to respect the configured defaults:
public function render( $atts ) {

    // Pull saved settings as the defaults
    $options = get_option( 'orbit_testimonials_settings', array() );
    $default_count = isset( $options['default_count'] ) ? $options['default_count'] : 3;

    // Shortcode attribute overrides the saved default if provided
    $atts = shortcode_atts( array(
        'count' => $default_count,
    ), $atts, 'testimonials' );

    // ... rest of the render logic
}
Now the plugin has a proper configuration layer: users set a sensible default in the settings page, and can still override it per-shortcode when needed. This is exactly how well-designed plugins balance global settings with per-use flexibility.
Common Settings API Pitfalls
- Mismatched group names. The group in
settings_fields()must exactly match the first argument ofregister_setting(), or saving silently fails. - Forgetting the sanitize callback. Without it, unsanitized data goes straight to the database. Always define one.
- Wrong page slug. The page slug in
do_settings_sections(),add_settings_section(), andadd_settings_field()must all match. - Not using array option names. Storing every field as its own option bloats the database; group them under one option array instead.
- Skipping capability checks. Always require
manage_options(or an appropriate capability) on the settings page.
Final Thoughts
The Settings API has a reputation for being confusing, but the confusion comes almost entirely from not seeing how its four pieces — setting, section, field, and page — connect. Once that hierarchy is clear, it becomes the cleanest and most secure way to add configuration to any plugin. WordPress handles the form security, nonce verification, and saving; you just define the structure and the sanitization.
Building settings this way means you never hand-roll form processing or worry about missing a security check. It's more code than a quick custom form up front, but it's correct, secure, and instantly familiar to any WordPress developer who opens your plugin later.
In the next post, we'll take this plugin further by adding a custom database table — for when post meta isn't the right fit and you need structured, queryable data with the $wpdb class and proper schema management.